Smart-Contract-interaction
Interaction with a Smart Contract on soarchain
This guide will aim to provide you all information about interacting with Soarchain Smart contracts via JavaScript runtimes such as Node.js and the browser. This is useful for dApp developers who need to create their own contracts on the Soarchain. There are some requirements that need to be done before starting to develop.
Basic Blockchain & DApp Understanding — These documents suppose you are familiar with, or having used DApps before. We also will be assuming that you have Blockchain installed and have a basic understanding of it!
Prerequisites
- Smart contract should be written using Rust language
- Smart contract should already be deployed into the Soarchain network
- An account should be registered into the Soarchain network, this will use as a sender and will pay for gas and fee amounts
- A local Soarchain node should be launched - (Not needed when connecting to mainnet)
You will find more information about how can write Cosmwasm smart contracts from Here
Setting Up the Project
- Install npm and node.js
- Install cosmwasm package
- Install cosmwasm-stargate package
- Install proto-signing package
- Create a wallet by the mnemonic
- Create a client by "soar" prefix
Once, the contract is uploaded to the chain with a Code Id and is ready to be instantiated.
First Define a rpc endpoint and create a client object:
let rpcEndpoint = "http://localhost:26657/";
OR you can also connect to the devnet by replacing rpcEndpoint
Second Create a wallet with a specific mnemonic and soar prefix. Using a wallet object we can configure the client object which helps to send to the node and receive from the node.
    let wallet = await DirectSecp256k1HdWallet.fromMnemonic(mnemonic, {
        prefix: 'soar',
    });
Third Create a client object with using SigningCosmWasmClient. The class SigningCosmWasmClient is exported from the CosmJS package @cosmjs/cosmwasm-stargate.
    let client = await SigningCosmWasmClient.connectWithSigner(rpcEndpoint, wallet, {
            prefix: "soar",
    });
Now once you have deployed the smart contract you can get the contract address form the node or show the contract list. We describe how to query a smart contract form the Soarchain network by a contract address.
The contract we are interacting with has a few simple functions. 'Query' is for fetching the data from the node related to the contract. These two functions can be called via by using the queryContractSmart and getContract methods. For making a query to the contract we use the below code.
Get Contract
For getting a contract from a specific address, you may fetch all contracts from the node and pick the one that you need it or like what mentioned above you can query for a specific contract by giving the contract address. We assume you do not have a specific address.
Sample of Soarchain contract address: soar14hj2tavq8fpesdwxxcu44rty3hh90vhujrvcmstl4zr3txmfvw9sg0qwca
const codeId = 1
const contracts = await client.getContracts(codeId)
const contractAddress = contracts[0].address
const contractData = await client.getContract(contractAddress)
console.log("Contract Data", contractData)
If you run the code, you will see the below result as a response:

Changing the state of the contract
The contract we are interacting with has a few simple functions for changing the state of the contract. 'instantiate', 'execute'. for execute this contract we need to use 2 ExecuteMsg {Increment,
Reset,}
Let's see how it works:
  const contractAddress = "soar14hj2tavq8fpesdwxxcu44rty3hh90vhujrvcmstl4zr3txmfvw9sg0qwca"
  const msg = {"increment": {}}
  let fee = {
      amount: [{amount: "5000",denom: "utsoar"}],
      gas: "500000"
  }

  await client.execute(
      (await wallet.getAccounts())[0].address,
      contractAddress,
      msg,
      fee,
      mnemonic,
  ).then((response) => {
      console.log("response", response)
  }).catch((error) => {
      console.log("error", error)
  });
After running this code, you will get bellow response:
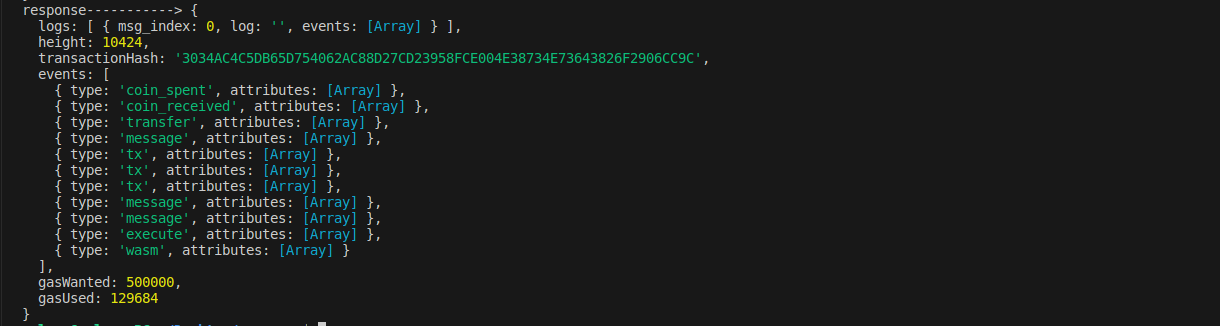
The tx hash is prepared and count increased.